How to set up your Public Profile
A summary of all the parts of the Speaker Profile!

Hey Talkadotters!
Your Public Profile is the core of your Talkadot Public face. Its what people see when they find you on the Speaker Search, its what your Proposals are built with the help of, and its a great tool to send to potential clients so they can see what you’re all about.
Setting up the Profile can seem daunting though, so I’m here to give you the basics. 😀
Also, its important to note that what you see when logged in to your Profile is different than what someone else will see, so its important to check your Profile while logged out or an incognito window to see the differences!
You can find your Profile on the left hand menu under the ‘Your Brand’ entry. Let’s start at the top!
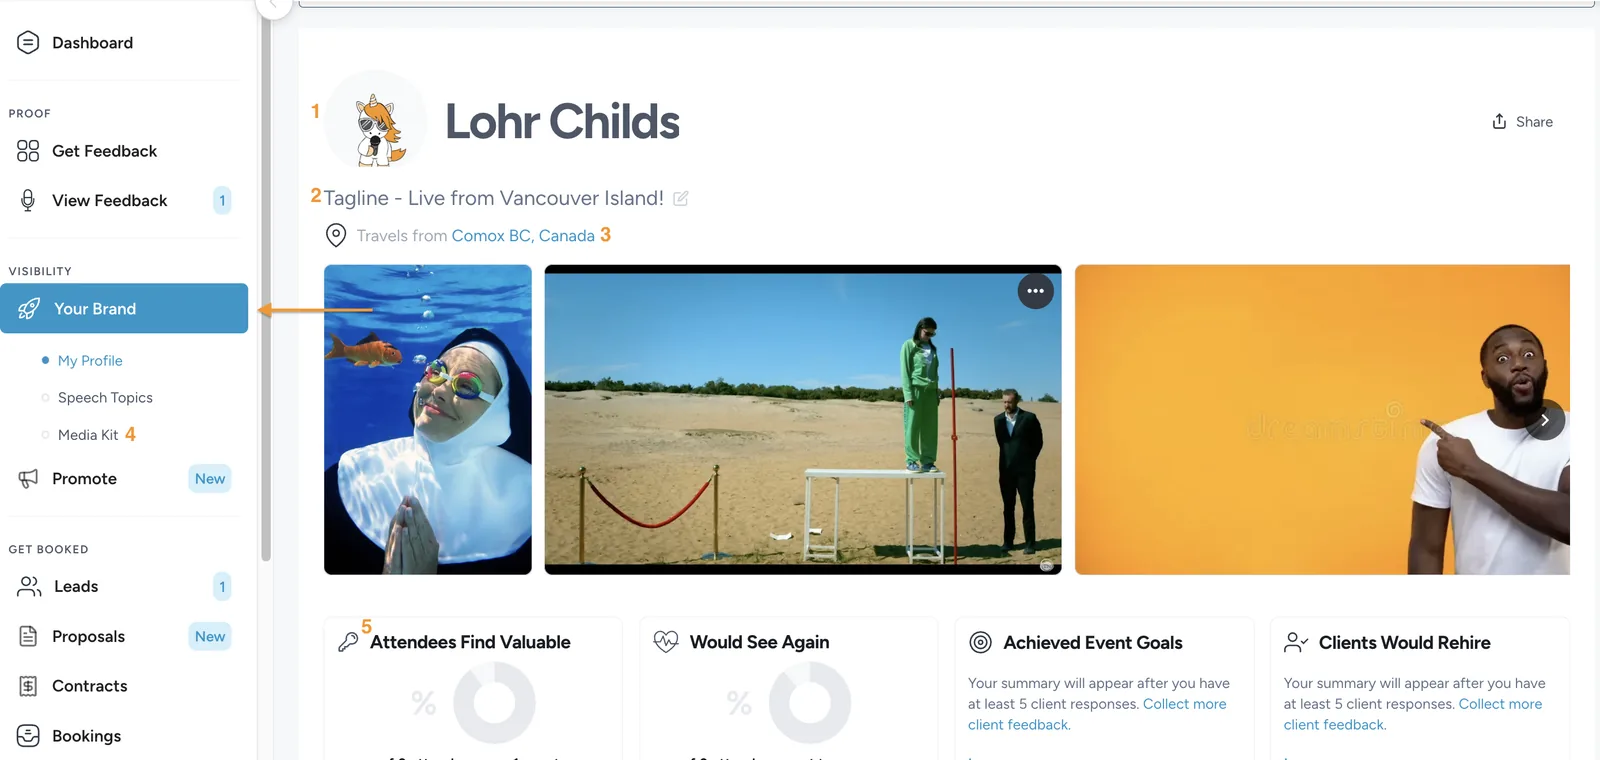
- Your Profile Picture, pulled from when you setup your account. This can be changed in the ‘Account Settings’
- Your Tagline! This should be a short sentence about what you are all about, or what you speak about.
- This is where you travel from. This can either be the town where you live, or the nearest major hub, whatever works for you! This is primarily used for Speaker Searches if an Event Planner is looking for someone local / who doesn’t need to travel.
- On the left hand side under ‘Your Brand’ you’ll see ‘Your Profile’, ‘Speech Topics’ (we’ll get there), and ‘Media Kit’ the Media kit is what determines the carousel of images between 3 and 5. Your Media Kit should contain headshots, action shots of you in front of audiences and some short videos of you speaking so that people can get a feel for what you are about! The Media Kit can hold up to 10 files, and the file size limit for each item is 2GB, so if you’re uploading videos to your Media kit, they’ll need to be under that size.
- This is where your feedback data will appear. As you collect data and information these boxes will fill with graphics representing that feedback.
Further down, you’ll see even more!
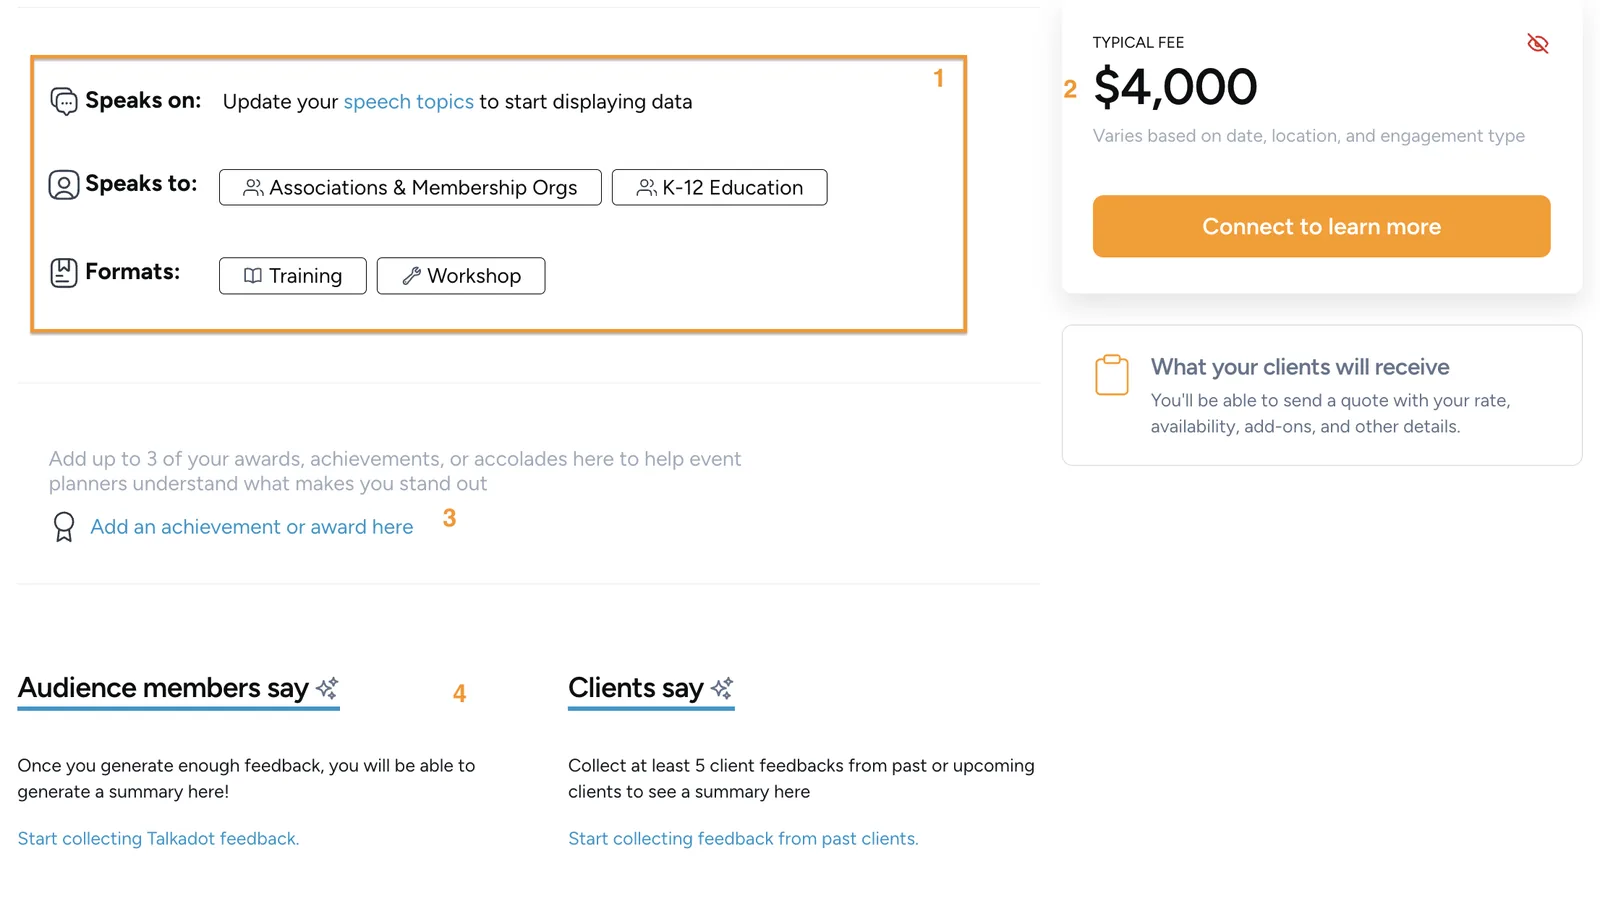
- These are the ‘Speaks on’ and ‘Speaks to / Formats’ tags. The 'Speaks On' tags on your Profile are generated automatically based on your created Speech Topics!
Each topic will generate up to two tags (if there's enough information for the system to do so) based on the description in the Speech Topic. Its important that these tags stay impartial, and are created by the system. Your Profile will display a maximum of six distinct tags. If all of your tags are unique, then three Speech Topics will hit this cap, but if you have the same tag on multiple Topics it may take more.
The ‘Speaks To / Formats’ tags are both determined by data you add when you create a Talk, and so can be easily changed by editing your existing talks. - This is where you would put your average fee. This is intended to be a mid-line estimate and not something that covers every circumstance. You can turn this off by clicking the eye icon, but this will also turn off the ‘Contact’ widget that goes with the Typical Fee.
- This is an area for you to list up to 3 achievements and awards!
- The Audience Summary and Client Summary are generated automatically once you have enough data. The Audience summary will be built off of Testimonial and Feedback responses. Both require a certain amount of collected feedback, including sufficient response length, to generate, so while you can hit the Client Feedback in 5 responses, it will typically take closer to 10 responses to show up.
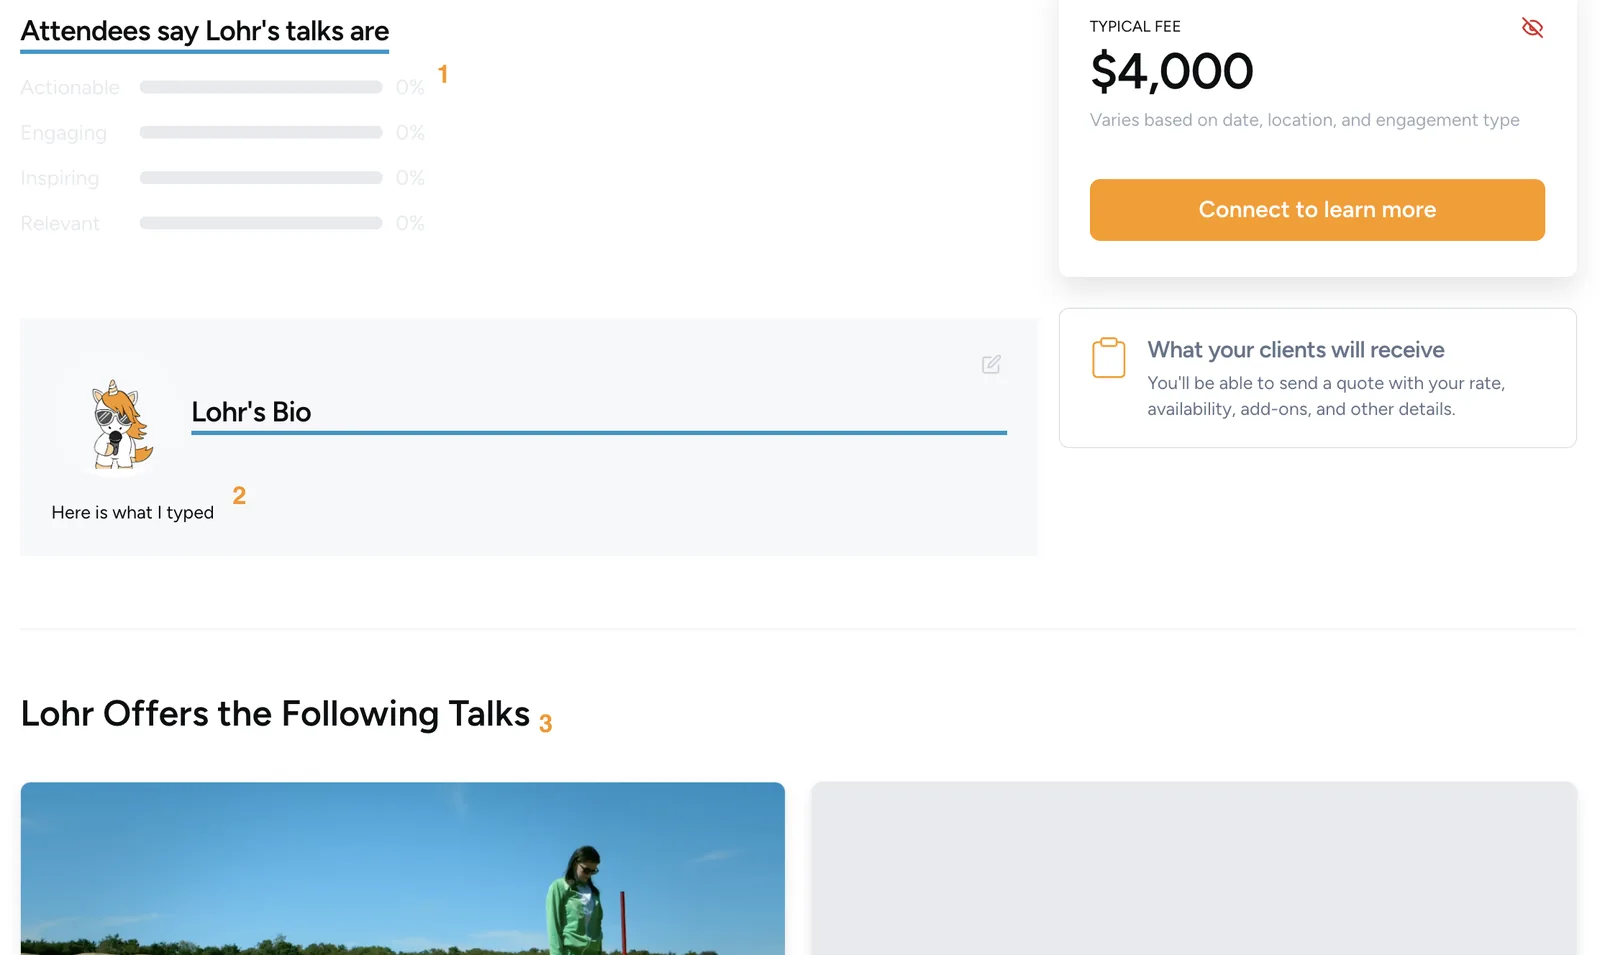
- This is another area where data from your Talks will fill in!
- The Bio is an area to type up a short synopsis of who you are, and what you speak on! It has a 1000 character limit, so you can adda fair amount, but don’t go crazy. 😀
- We’ve reached Speech Topics! The Speech Topics are another hugely important aspect of the Public Profile. Think of them as your Signature Talks. You can create them on the Speech Topic menu, and they give you the opportunity to explain in detail about something you talk about, as well as to attach an extended video. A Speech Topic can hold up to a 10GB video, and is one of the most valuable things you can add to your Profile.
Below the Speech Topics, you’ll see your Testimonial data from your Audience. This can be organized by going into the Talk Reports the Testimonial data is from, and clicking the ‘Star’ icon by a specific response to move it to the top!
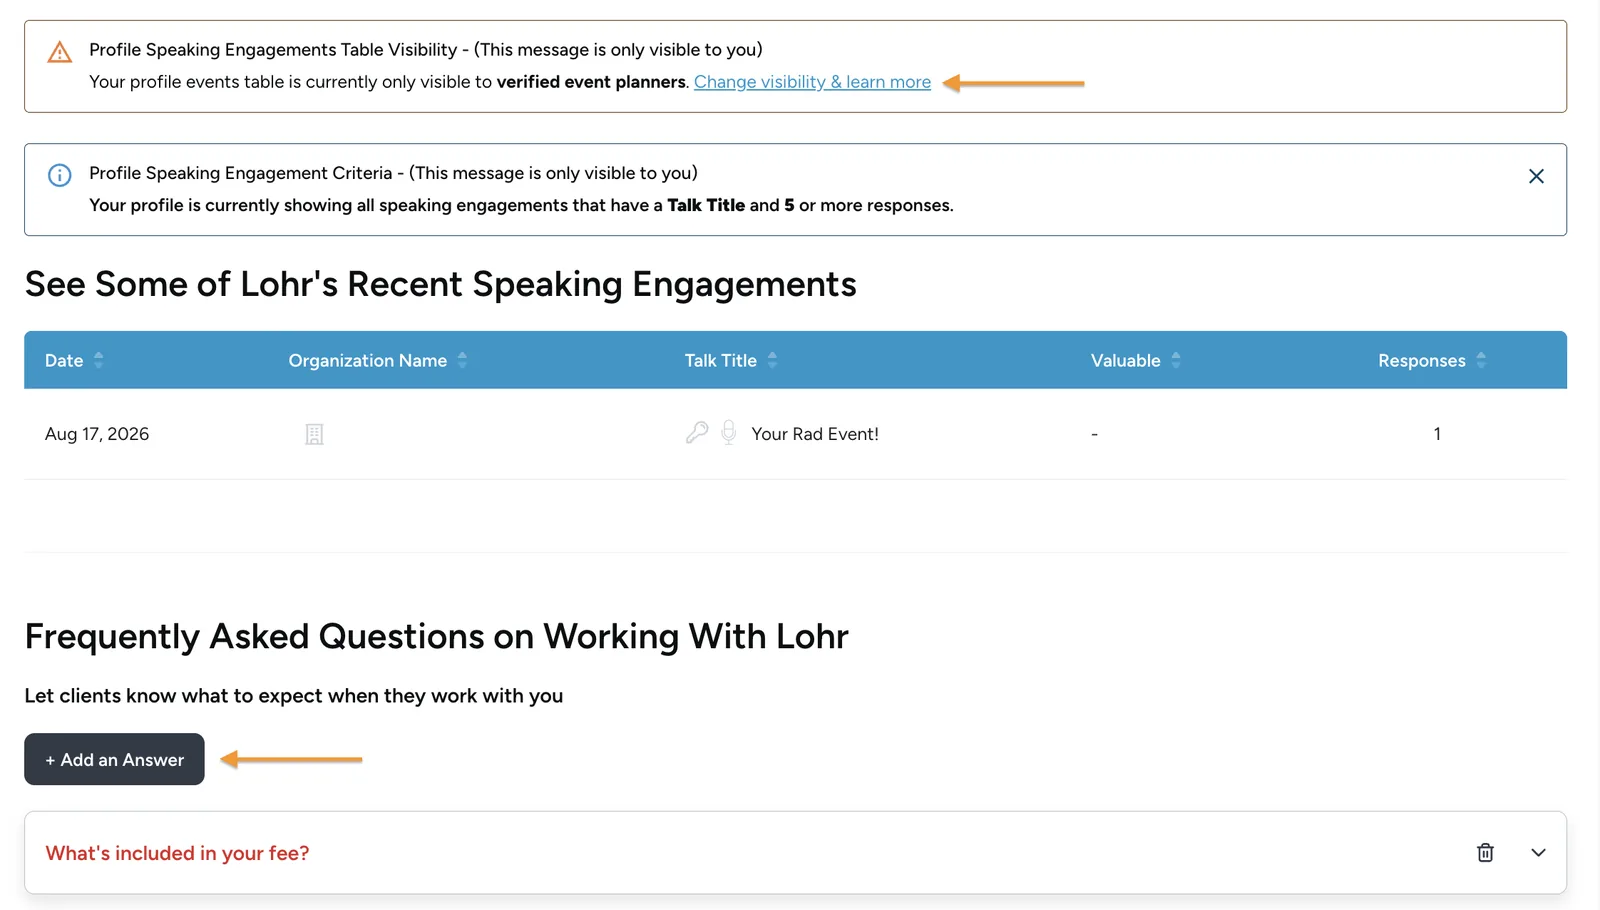
Then you can set the visibility of your individual Talk Reports. You can set it so that this table where all your separate talks show up (and can be clicked into to look at in more detail) doesn’t show up at all, only shows to Verified Event Planners (people we at Talkadot have confirmed hire speakers) or anyone. Its completely up to your comfort level.
Below that is a section for you to fill out Frequently asked questions about yourself, and then a section you to link your socials and any publications about you (articles, books you’ve written, etc.).
You did it, that’s all the parts! I know it can seem like quite a lot to bite off all at once, but the goal is to give you something that you can send directly to prospective clients so they can see why you’re such a good hire, all in one place! If you want to make that even more targeted, you can build a Proposal, pulling specific data and Speech Topics off of your Profile.
Our goal is to give you the tools to help make you the best speaker that you can be!